Cursor MCP Server Integration
How to integrate Cursor with Aluvia's MCP server for enhanced AI capabilities.
Setup Guide
1
Prerequisites
Before you begin, ensure you have the following:
- Node.js installed and up to date
- An Aluvia account (new users get free credits for testing)
- An Aluvia Token from your Aluvia Dashboard under Credentials
💡Tip
Your Aluvia Token will look like: 2dceb1aa0***************************
2
Basic Configuration
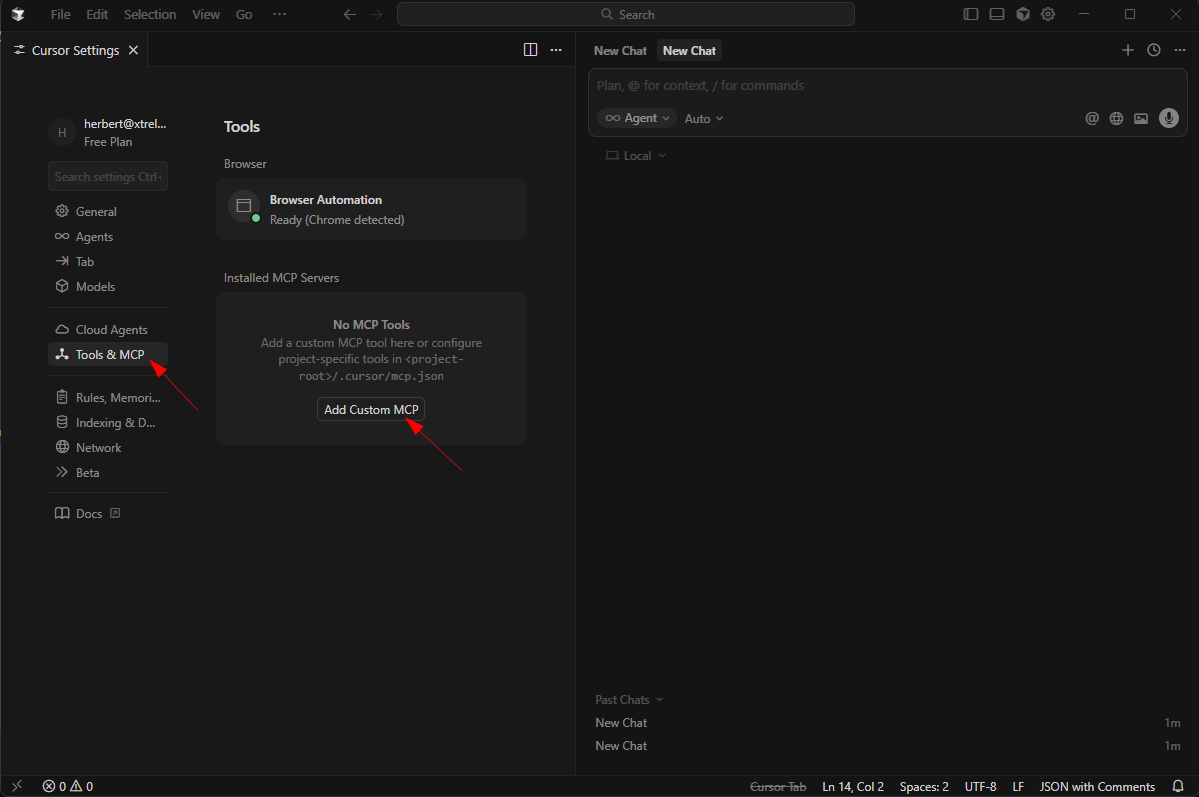
Go to Cursor → Click the gear icon → Tools & MCP → Add Custom MCP → add the following:
{
  "mcpServers": {
    "Aluvia": {
      "command": "npx",
      "args": [
        "-y",
        "mcp-remote",
        "https://mcp.aluvia.io",
        "--header",
        "Authorization: Bearer YOUR_ALUVIA_TOKEN"
      ]
    }
  }
}
Replace YOUR_ALUVIA_TOKEN with your actual Aluvia Token.
After saving this configuration, you should see the Aluvia MCP server connected and available inside Cursor's AI assistant.

3
Verify Connection
Once configured, verify everything works:
- Open Cursor’s AI chat
- Ask the assistant: "Can you list my Aluvia connectivity credentials?"
- The AI should retrieve your credentials through the Aluvia MCP server
If successful, Cursor will display your connectivity credential details and account information.
4
Test Credential Functionality
You can now test Aluvia operations directly from Cursor. Try asking:
- Create a new connectivity credential
- Test an existing connectivity credential
- Show your usage statistics
Example prompts:
- "Create a new connectivity credential for a workflow"
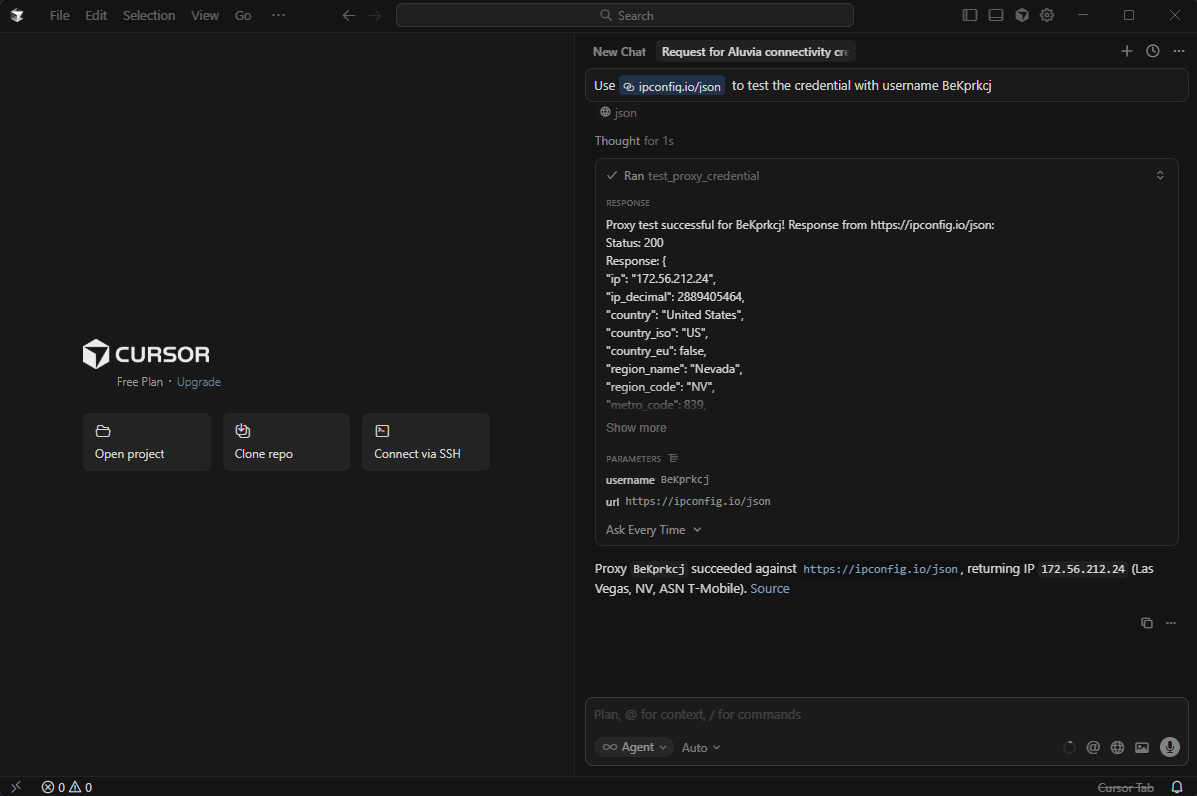
- "Test the credential with username 'username123'"
- "Show me my current data usage statistics"