Vapi AI MCP Server Integration
How to integrate Vapi AI with Aluvia's MCP server for enhanced AI capabilities.
Setup Guide
Prerequisites
Before you begin, ensure you have:
- A Vapi AI account
- An Aluvia account
- Your Aluvia Token, available on the Dashboard → Credentials
Your Aluvia Token looks like: 2dceb1aa0***************************
Login to Vapi AI
Log in to your account at vapi.ai.
Get Your Aluvia Token
Go to the Aluvia Dashboard, open the Credentials page, and copy your Aluvia Token.
Access the Tools Section
In the Vapi dashboard, open the Tools section from the navigation menu.
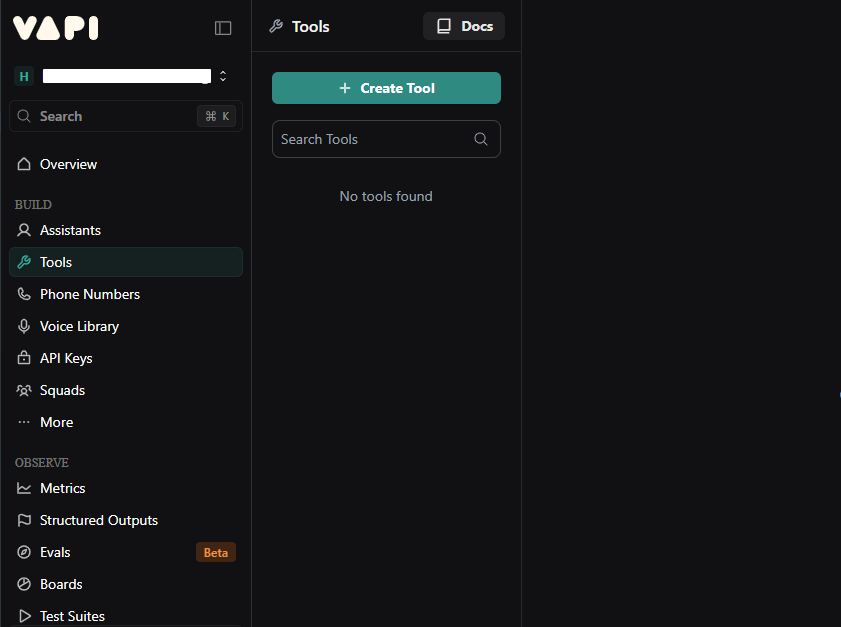
Create a New Tool
Click Create Tool to begin adding a new MCP integration.
Choose MCP
Select MCP as the tool type for the new integration.
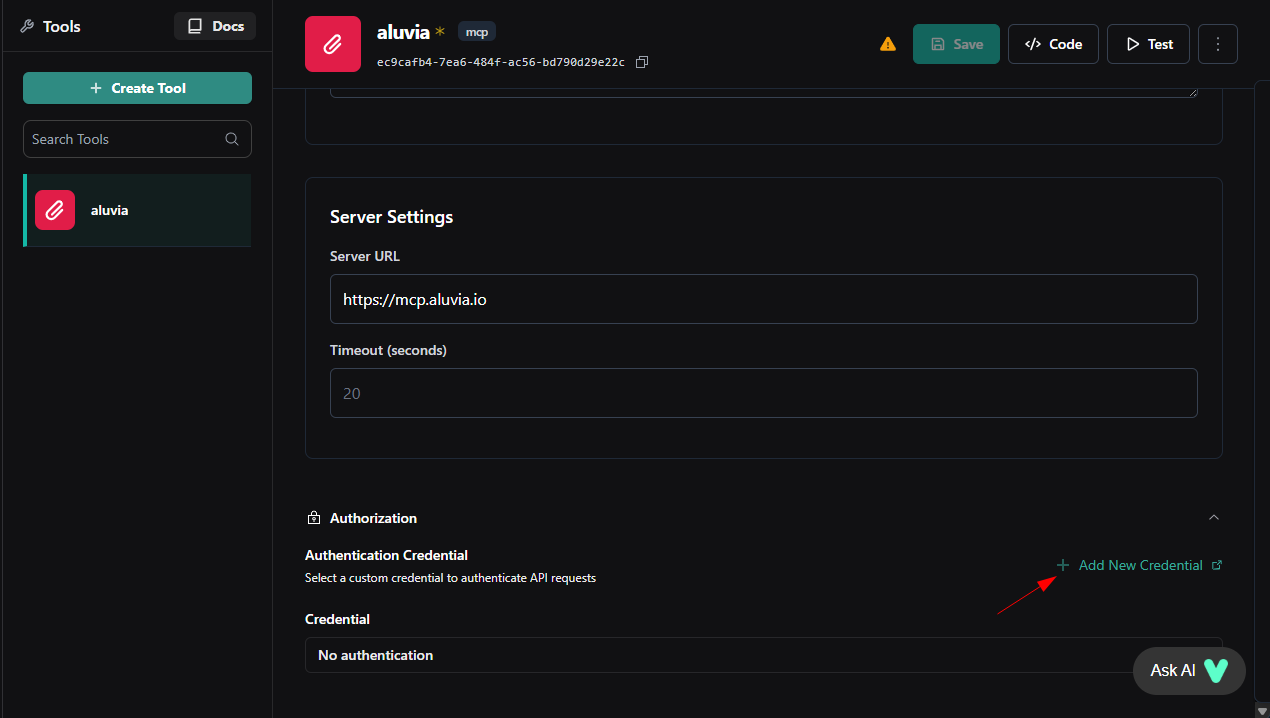
Configure the MCP Server
Use the following settings:
- Name:
aluvia - MCP Server URL:
https://mcp.aluvia.io - Timeout:
120seconds
Authentication Credential
Vapi supports using an Authentication Credential to securely store your Aluvia Token. If you create one and select it for your MCP tool, Vapi will automatically attach the Authorization: Bearer YOUR_ALUVIA_TOKEN header to every request.
- Scroll to the Authorization section in your MCP tool configuration.
- Click Add New Credential.
- Select Add Custom Credential and choose the type as Bearer Token.
- Name it something like Aluvia Token.
- Paste your token from the Aluvia Dashboard → Credentials page.
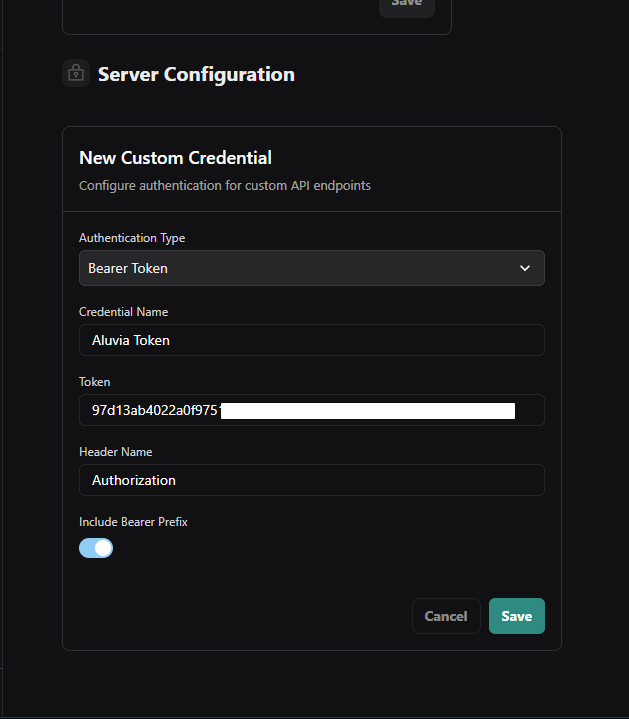
- Save it.
- Select the credential from the Authentication Credential dropdown.
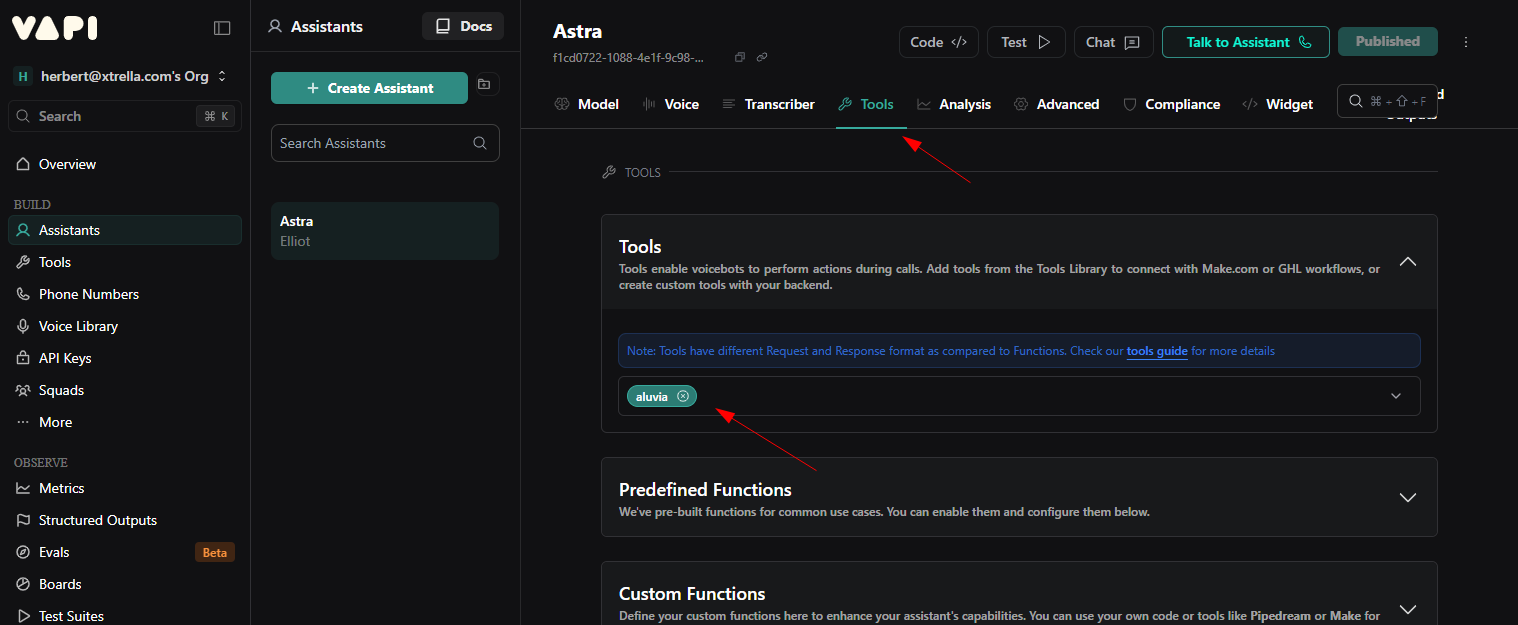
Add the Tool to Your Assistant
Open your assistant settings in Vapi and attach the Aluvia MCP tool to enable the integration.
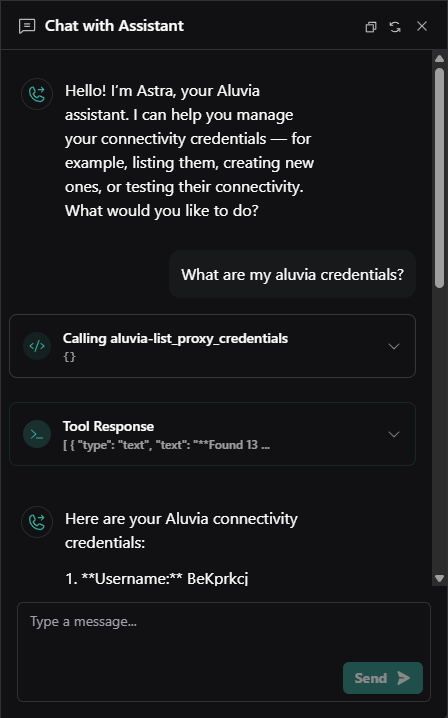
Test the Integration
Verify everything works by interacting with your assistant through the Vapi chat interface or a test voice call.
Try commands like:
- "What are my Aluvia credentials?"
- "Create a new connectivity credential"
- "Test the credential with username 'username123'"
- "Show me my current data usage"
Your assistant should respond using the Aluvia MCP tools.